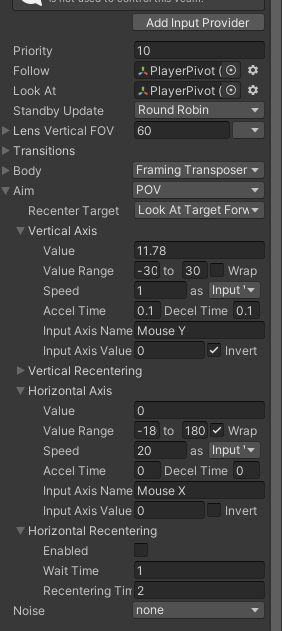
카메라의 x축 y축 회전을 코드 한줄 없이 할수있는 형태
Body를 Framing Transposer로 놓고
Aim을 POV
단 카메라의 회전이 캐릭터와 아무 상관없이 그냥 독자적으로 회전하기 때문에,
만약 캐릭터의 바로 뒤에 카메라가 있게 하고싶다면, speed 설정을 때려맞춰야한다
Horizontal에서 accel Time등을 빼서 가속 감속을 빼고, speed를 20으로 해놓은게 일단 그 설정인데,
모든 컴퓨터에서 저대로 맞춰질진 모른다.
this.transform.Rotate(0,this.inputCtrl.Look,0);


InputCtrl쪽 코드


        this.lookInputAction.performed += (ctx) =>
        {
            this.Look = ctx.ReadValue<float>();
        };
따로 회전 속도를 준 내용은 없다
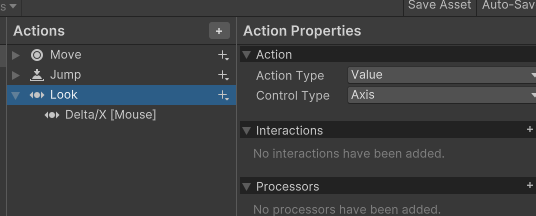
inputSystem쪽 내용
_______________________________________________________________________________
Virtual Camera
y축 회전
this.activeCam.GetCinemachineComponent<CinemachineTransposer>().m_FollowOffset.y
+= this.inputCtrl.LookY * 0.1f;
this.activeCam.GetCinemachineComponent<CinemachineTransposer>().m_FollowOffset.y =
    Mathf.Clamp(
    this.activeCam.GetCinemachineComponent<CinemachineTransposer>().m_FollowOffset.y,
    -2,
    5);
Cinemachine에서

이런 Body를 불러올때는 GetCinemachineComponent라는 내용이 있는걸 배웠던걸 이용해서
저 내용을 불러온 다음 Follow Offset의 y값을 input System의 입력값으로 변화 시켜서
Clamp를 이용, Y축 회전에 제한을 걸고 회전시킨다.
___________________________________________________
~~~ Constraint 시리즈
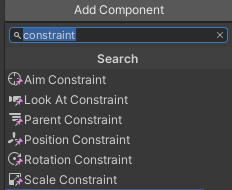
부모에 안넣고도, 부모에 넣은 효과를 내는 컴포넌트들
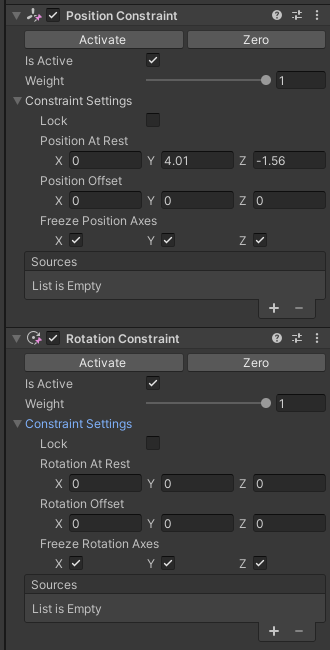
Sources에 집어넣으면
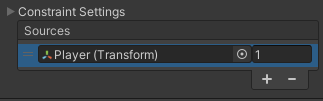
해당 트랜스폼을 부모로써 판단한다
여러개 넣을수도 있고, 옆에 있는 숫자는 만약 여러개일때 어느정도 비중으로 따를건지 하는 내용
###################
sources 동적 할당
var a = new ConstraintSource();
a.sourceTransform = this.transform;
a.weight = 1;
this.cameraLookTr.GetComponent<RotationConstraint>().AddSource(a);
this.cameraLookTr.GetComponent<PositionConstraint>().AddSource(a);
AddSource라는 함수가 안에 있지만, 매개변수로 평범하게 transform을 받는게 아닌, 옆에 weight(float)까지 포함시킨
ConstraintSource라는 구조체를 매개변수로 받는다.
새로 만들고, 안에 sourceTransform과 weight를 할당하고, 그 ConstraintSource를 매개변수로 집어넣는다
####################
내부 Freeze~~~ Axes 코드 내에서 설정하는 법
this.cameraLookTr.GetComponent<RotationConstraint>().rotationAxis = Axis.X | Axis.Z;이 코드를 실행 시키면
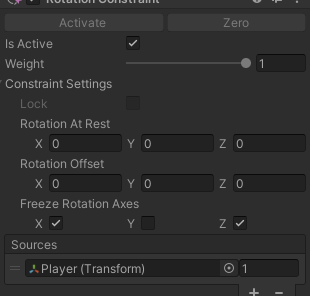
명시된 X와 Z만 체크된다
(체크 된게 sources로 잡힌 부모의 움직임을 따라가는것)
#############################################
마우스를 돌려서 캐릭터가 돌아가는것과, 화면을 돌려서 캐릭터를 볼수있는걸(드래곤네스트 식 화면) 이걸 이용해서 구현했다.
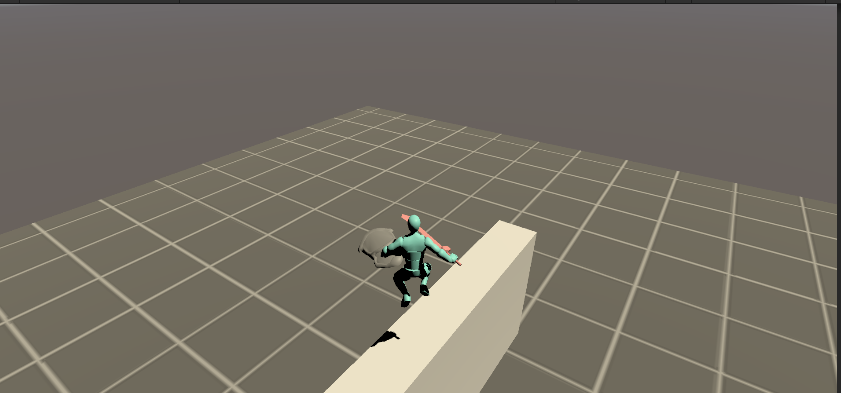
기본상태
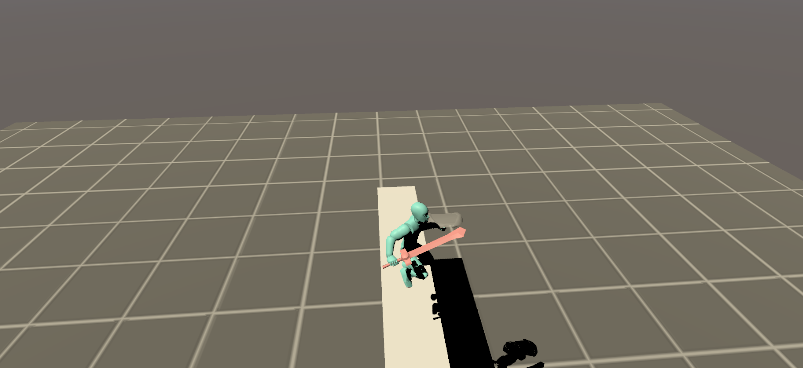
휠버튼을 누르고 마우스를 돌린 상태
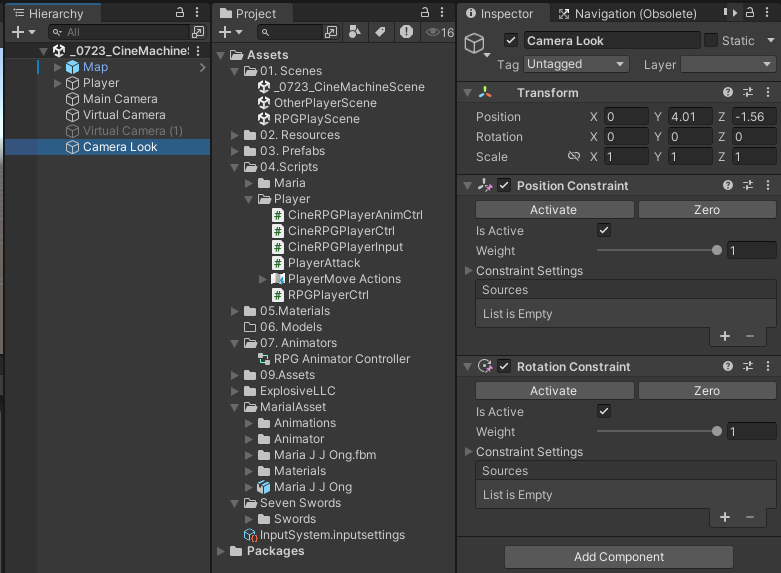
미리 Player의 밖에 있는 Camera Look이라는 컴포넌트를 만들고
내부에 PositionConstraint와 RotationConstraint를 넣는다
        var a = new ConstraintSource();
        a.sourceTransform = this.transform;
        a.weight = 1;
        this.cameraLookTr.GetComponent<RotationConstraint>().AddSource(a);
        this.cameraLookTr.GetComponent<PositionConstraint>().AddSource(a);
플레이어의 코드에서 시작할때 sources로 캐릭터의 Transform을 잡고
if (Input.GetMouseButtonDown(2))
{
    this.CharRotate = !this.CharRotate;
}
휠버튼을 누르면 상태가 반대쪽으로 전환되는 토글형태
public bool charRotate = true;
public bool CharRotate
{
    get
    {
        return charRotate;
    }
    set
    {
        this.charRotate = value;
        this.cameraLookTr.GetComponent<RotationConstraint>().enabled = value;
        //this.cameraLookTr.GetComponent<RotationConstraint>().rotationAxis = Axis.X | Axis.Z;
    }
}
해당 bool값은 프로퍼티로 구현하여, 바뀔때 RotationConstraint의 활성화 상태도 같이 건드리게 했다
private void Rotate()
{
    if (this.charRotate)
        this.transform.Rotate(0, this.inputCtrl.LookX, 0);
    else
    {
        this.cameraLookTr.Rotate(0, this.inputCtrl.LookX, 0);
    }
}
회전하는 부분에선 true라면 캐릭터가 회전하고, false라면 CameraLook이 회전하게 했다.
즉 true로 들어가면 CameraLook은 Player의 자식오브젝트처럼 동일하게 회전하여 카메라가 캐릭터를 그대로 따라가는 효과를 주고
false로 들어가면 CameraLook은 Player와 별개의 오브젝트로 혼자만 회전하여 캐릭터를 둘러볼수 있게된다.
둘러보고 나서 다시 휠버튼을 눌러 true로 들어가면 다시 자식오브젝트처럼 되어 카메라가 캐릭터의 뒤를 찍고있게 된다.
다만 여기서 카메라 회전을 x축만 건드리고있고, y축은 위에서 만든것처럼 따로 만들어버려서 x축만 원래대로 돌아간다